
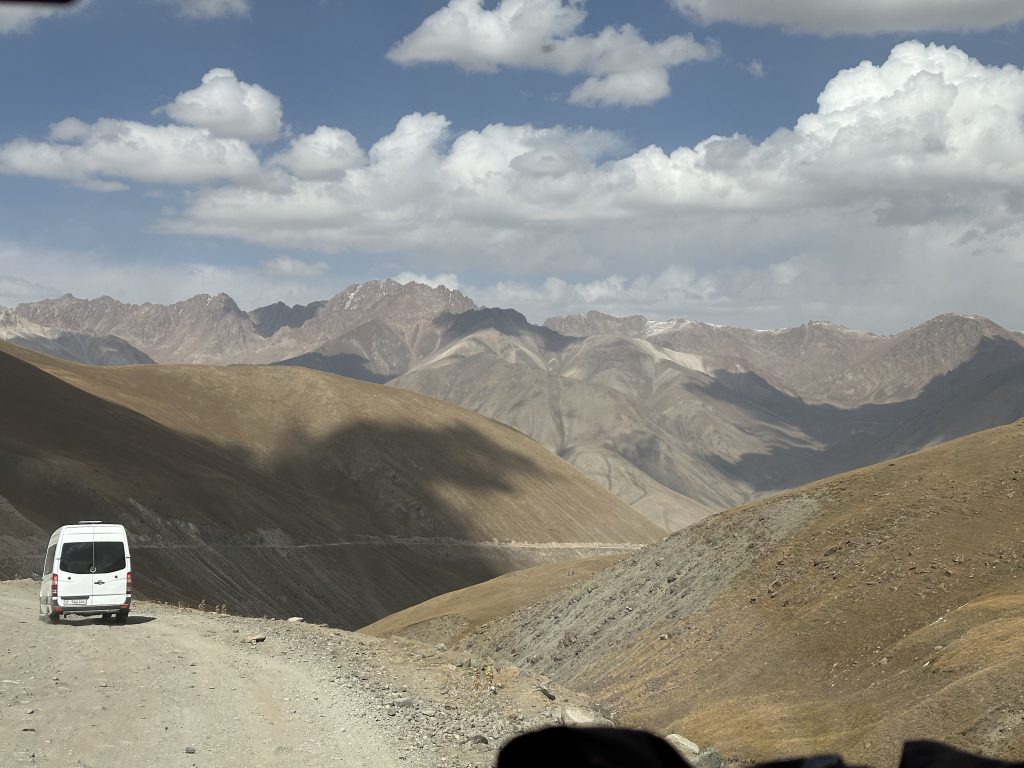
Travel vlogging is arguably one of the most thrilling and gratifying ways to share your journey with others. Whether you’re capturing the buzz of a Malaysia’s street markets or the serenity of a hidden beach in Portugal, your editing will make or break the final product. It’s not just about showing where you went—it’s about telling a story, creating a vibe, and pulling viewers into the experience alongside you.
If you’re looking for a simple yet powerful way to edit your travel vlogs, CapCut Desktop Video Editor is an excellent place to start—or to level up from basic editing apps. It’s free, packed with creative tools, and ideal for creating cinematic content without the complexity of professional-grade software. You can even boost your storytelling by using features like text to speech to narrate scenes where your voice wasn’t captured live.
In this article, we’ll break down how to edit travel vlogs like a pro using CapCut Desktop, with a real-world five-step workflow and clear instructions to help shape your raw footage into something you’re proud to share.


Table of Contents
Why Choose CapCut Desktop Video Editor for Travel Vlogs?
Travel vlogs need a balance of polish and personality. You don’t want your video to look flawless but lose that raw, immersive travel feel. CapCut Desktop Video Editor hits that sweet spot because:
- It supports high-definition footage, including 4K drone and GoPro clips.
- The user interface is intuitive, even for beginners.
- It offers transitions, filters, music, subtitles, and more—perfect for storytelling.
- It’s completely free, with no watermarks or usage restrictions.
Whether you’re editing a week-long road trip or a quick weekend getaway, CapCut gives you the creative control to make your travel memories pop.
Step 1: Get Organized and Import Your Footage
Editing begins before you hit the timeline. Travel footage is often scattered across devices, locations, and angles, so the first essential step is getting organized. Open CapCut Desktop and start a new project. Gather all your assets—video clips, photos, drone shots, music—and sort them into clearly labeled folders for easy access.
Click “Import” to bring everything into CapCut. Start shaping your story by dragging primary clips onto the timeline in the order you want them to appear. At this stage, don’t aim for perfection—just build the basic structure or “bones” of your vlog.
Pro Tip: Retitle or mark clips in CapCut to keep key moments (like sunsets, cityscapes, or food shots) top of mind.


Step 2: Trim and Build Your Narrative
The best travel vlogs aren’t just montages—they’re narratives. That means cutting the filler and crafting a flow that takes the viewer on a journey. For faster workflows, CapCut’s AI video generator tools can assist in creating smarter initial cuts, saving hours of manual editing.
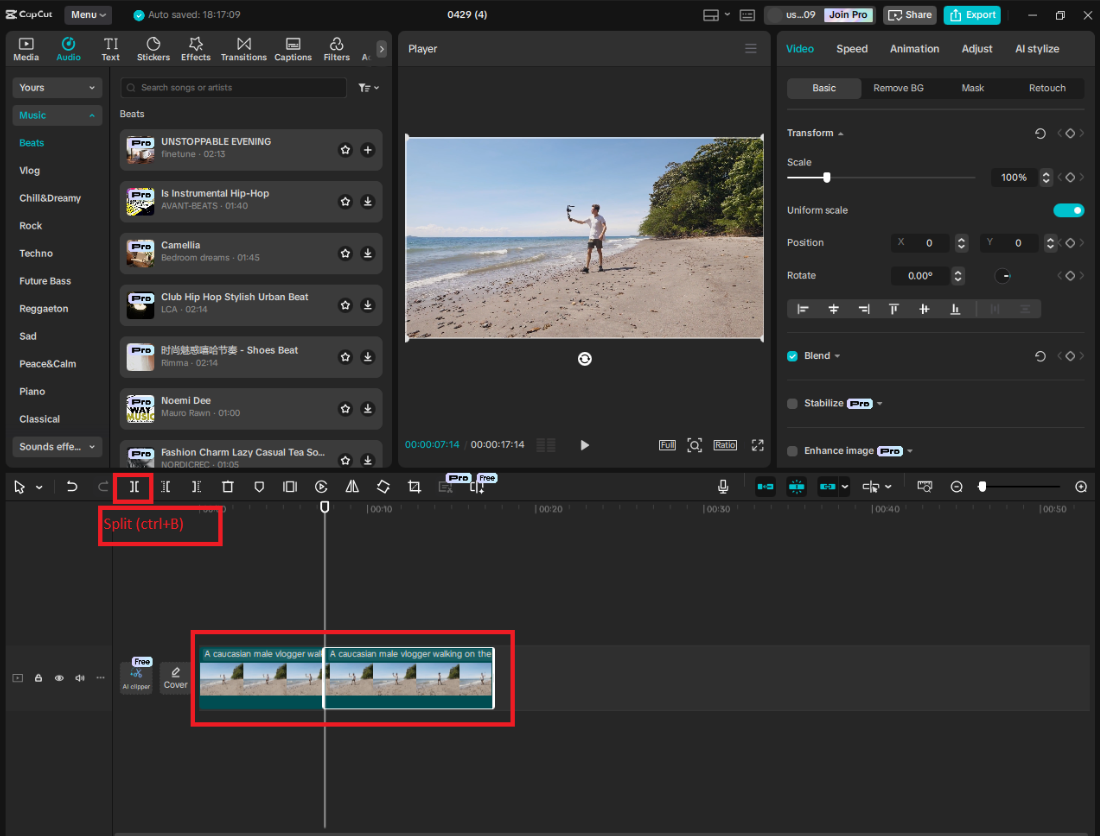
Use the Split tool (Ctrl + B) to remove shaky or repetitive footage, and start refining your sequence. Organize clips chronologically or by theme (e.g., Day 1: Arrival, Day 2: Exploring) to give your video structure. Smooth transitions between scenes to keep viewers engaged.
To improve watchability, insert title cards to mark new locations or days—this breaks the vlog into digestible chapters. Keep edits tight. While travel vlogs are popular, attention spans are short. Aim for 3–8 minutes per video, unless you’re producing a deeper documentary-style piece.

Step 3: Add Music, Voiceovers, and Ambient Sound
Sound design elevates your visuals into a full sensory experience, and CapCut makes this process straightforward.
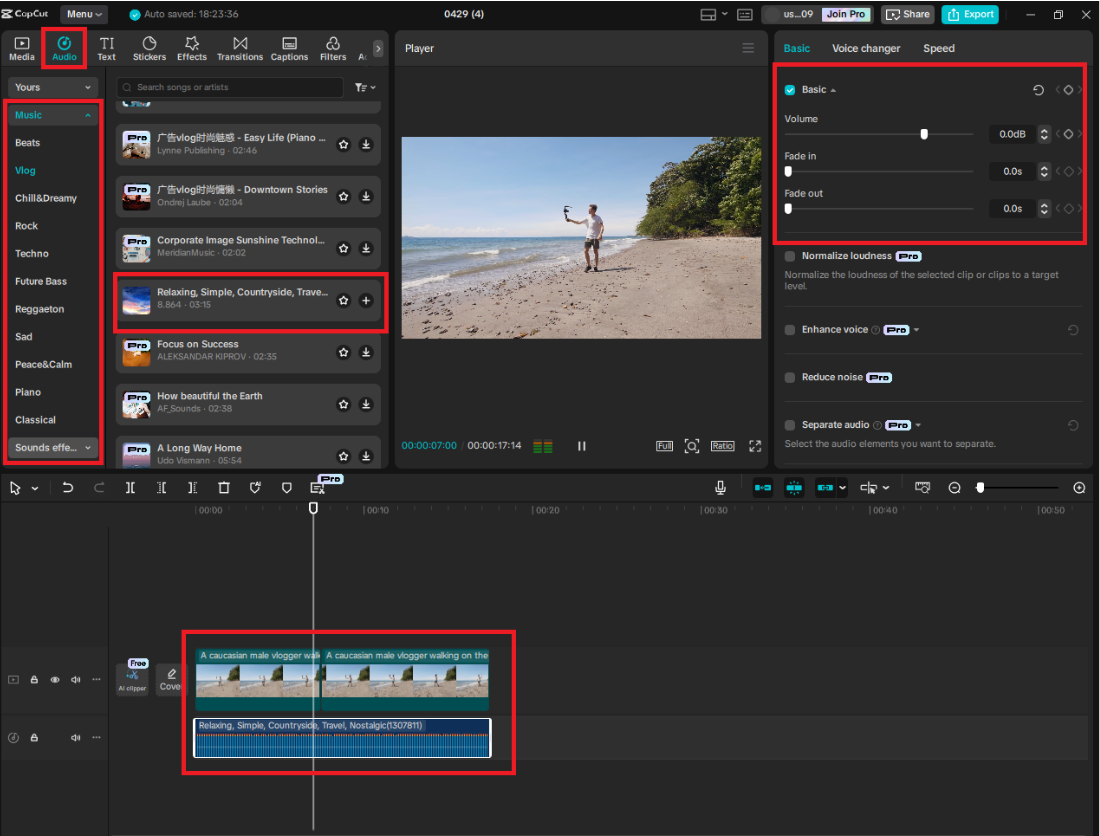
Start by heading to the Audio tab to explore CapCut’s free music library or upload your own licensed tracks. Choose music that fits your trip’s mood—lo-fi for urban strolls, acoustic for nature scenes, and upbeat tracks for group adventures. Drag the audio onto the timeline and trim it to fit your scenes. Use Fade In/Out and volume keyframes for smooth transitions.
For narration or commentary, record a voiceover directly in CapCut via the Record button under Audio, or import a pre-recorded file for a polished delivery. Don’t skip on original ambient sounds—waves, laughter, footsteps—these details add authenticity and immersion.
Tip: Keep your mix balanced. Don’t let music overpower your voice or natural audio. Adjust volume levels so every element has room to breathe.
Step 4: Enhance with Effects, Text, and Transitions
Now your vlog starts to look polished. CapCut provides powerful tools while keeping your video feeling organic.
Start with filters and color grading. Select a clip, go to the Color tab, and apply a LUT (Look-Up Table) for a consistent tone. Manually fine-tune exposure, contrast, saturation, and temperature to match the vibe of your footage.
Use transitions intentionally—fade to black for calm scenes or dynamic zooms and swipes for energetic moments. Stay consistent to avoid a jarring visual experience.
Add text and captions to introduce locations, share tips, or offer commentary. For extra custom graphics or backgrounds, using VistaCreate image generator can help you create bespoke designs—title cards, overlays, or themed frames—that align with your aesthetic. Choose clean, legible fonts, whether in CapCut or imported from VistaCreate.
Use CapCut’s effects (like glow, blur, or camera shake) with restraint—they should enhance your content, not distract from it. Let your destination’s visuals take the spotlight.
Want to play with sound? CapCut’s voice changer can add playful or atmospheric tweaks to specific segments.

Step 5: Export and Optimize for Platforms
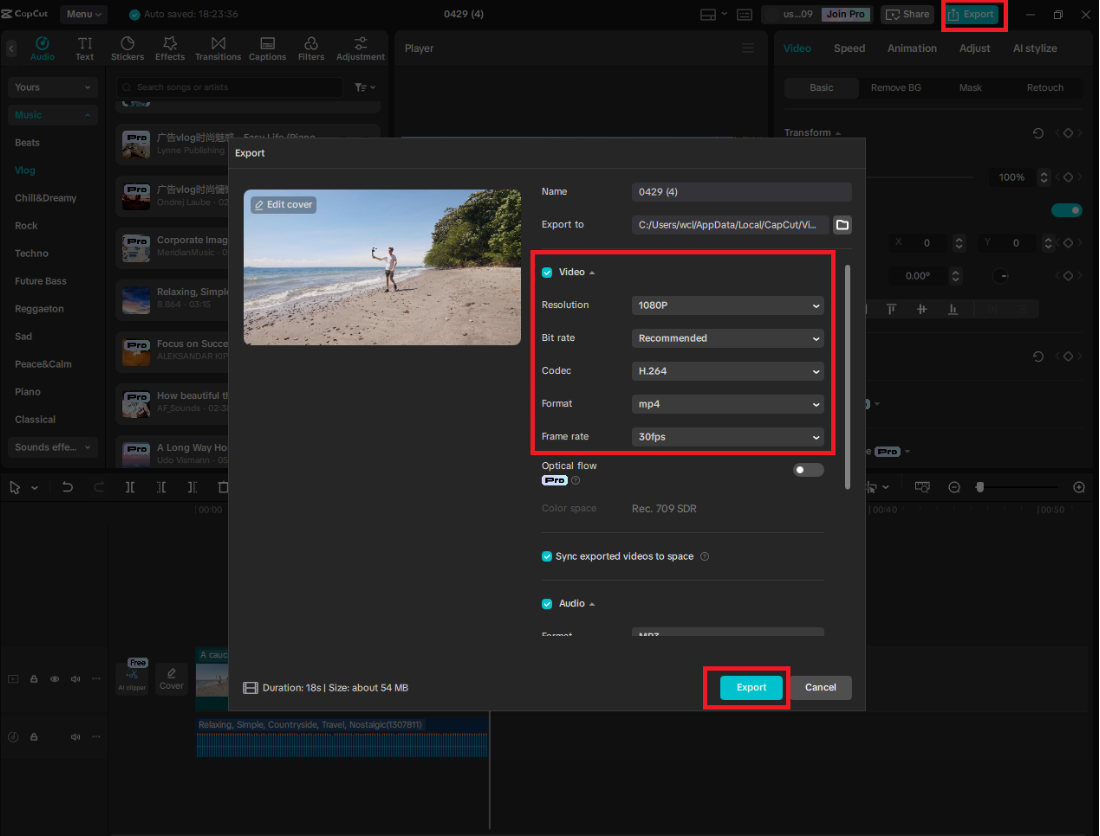
Once you’re satisfied with your edit, it’s time to share it. Click “Export” in the top-right corner. Before rendering, adjust settings for best quality—1080p works for most uploads, but 4K is ideal for cinematic travel shots. For frame rates, 30fps is standard, while 60fps is better for action-heavy or drone footage.
Final Thoughts
Editing a travel vlog doesn’t have to feel overwhelming. With a clear process and the right tools, editing can become one of the most enjoyable parts of content creation. CapCut Desktop helps you bring your travel experiences to life—whether you’re backpacking with a smartphone or flying drones with terabytes of footage.
Don’t let your clips collect digital dust. Open CapCut Desktop and start crafting your story, frame by frame.
*This article has been contributed to Owl Over The World.